how to install
Installing FloorEase Floor Tiles is fast and easy. Simply prepare the surface, click the tiles together, and your floor is ready to go — no glue, no mess!
DIY Installation Guidelines:
Installing your FloorEase Floor Tiles is a straightforward process that anyone can tackle — whether you’re a seasoned DIYer or trying it for the first time. Just follow the steps below to achieve a strong, stylish finish that’s built to last.
Check List:
- FloorEase Garage Modular Interlocking Floor Tiles
- Fine-toothed blade (Jigsaw)
- Pencil or Marker
- Rubber Mallet
- Straightedge or Ruler & Tape Measure
- Safety Goggles
- Dust Mask or Respirator (for protection against dust)
Step 1: Prepare the Area
Before installing your FloorEase floor tiles, make sure your garage floor is clean, dry, and flat. Sweep or vacuum away dust and debris, and wipe down any stubborn spots with a damp cloth. For best results, smooth out any uneven areas using a self-leveling compound.
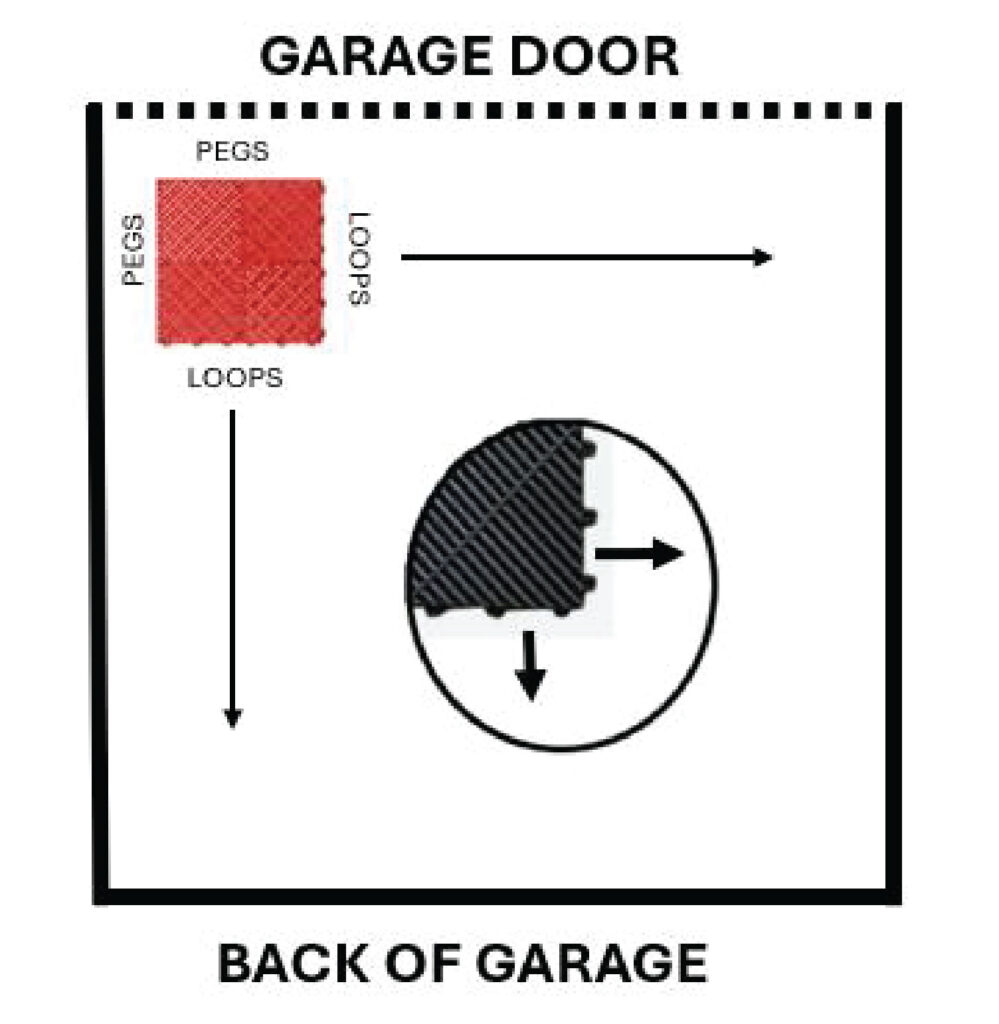
Step 2: Plan Your Layout
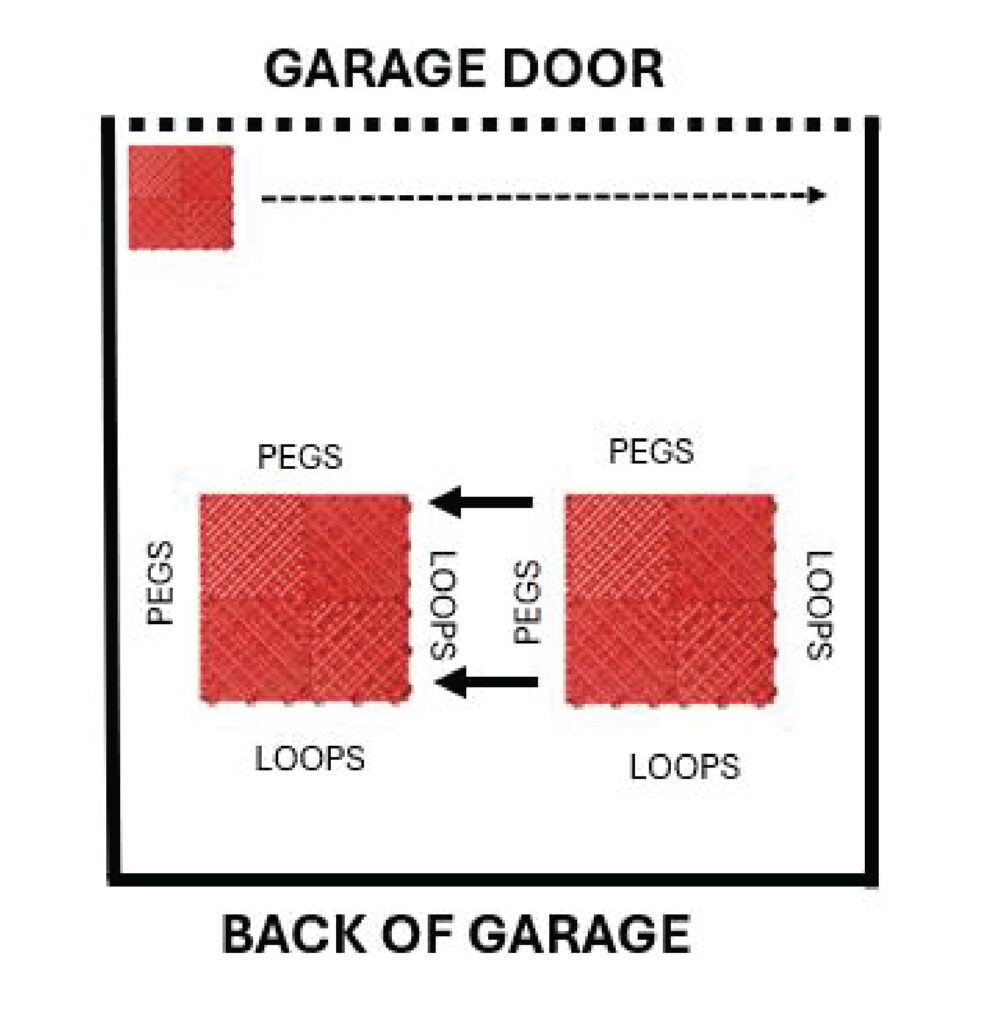
Start by measuring your space to ensure a proper fit and avoid uneven edge cuts. Begin installation at the garage entrance, ideally from the front left corner, with the pegs facing the wall—this makes it easier to snap tiles together. Dry-fit a row first to preview the layout, then place the first tile and continue by overlapping the peg side onto the looped edge of the previous tile. Align each one the same way to keep your installation smooth and efficient.
Step 3: Add Ramps
For a clean, finished edge, attach female (looped) ramps to the male (pegged) sides of tiles facing the garage opening. If you’re creating a standalone pad or island, you’ll also need pegged ramps on the opposite side, along with corner pieces to complete the look.
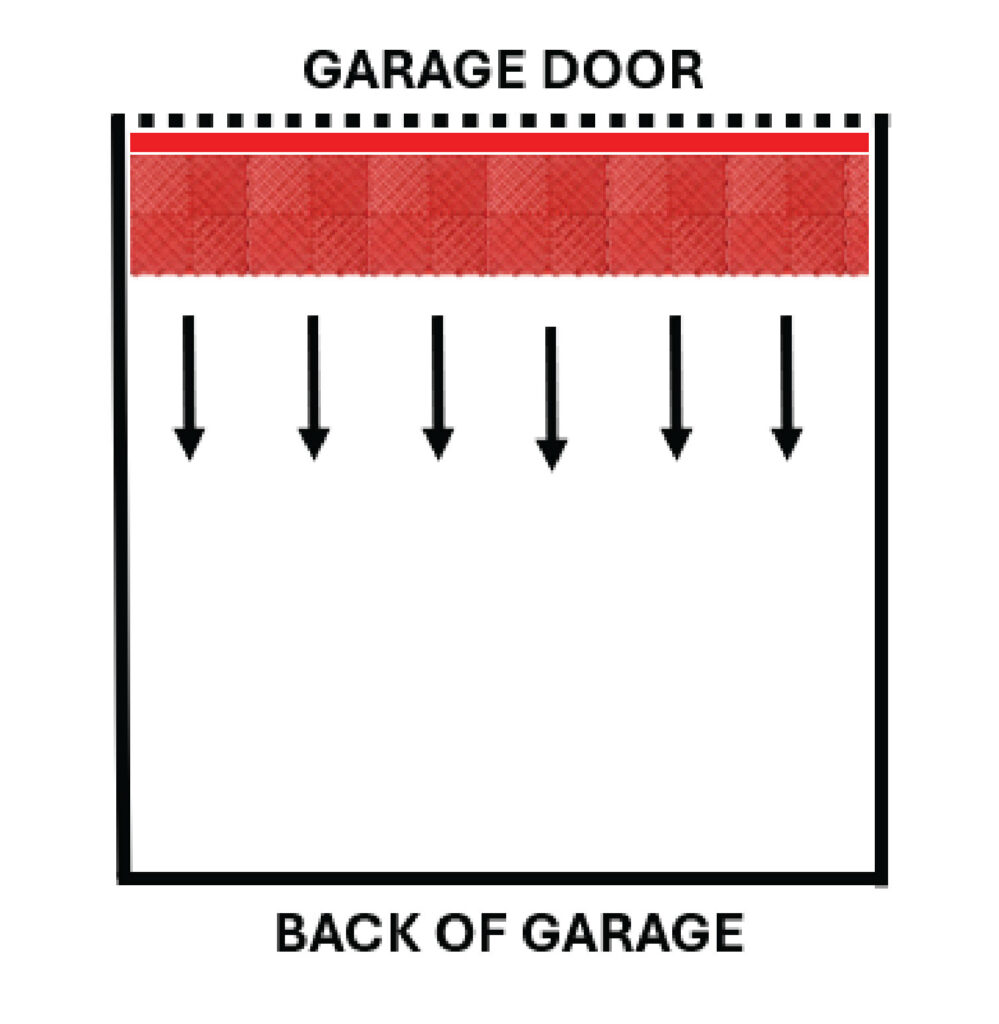
Step 4: Adjust against your Garage Door.
Before finishing up, double-check that your garage door closes properly. The door should not press down on the ramp. If it does, simply shift the tiles back slightly, making sure there’s still an even gap on each side. We recommend leaving a 5–10mm clearance between the tiles and the garage walls for the best fit.
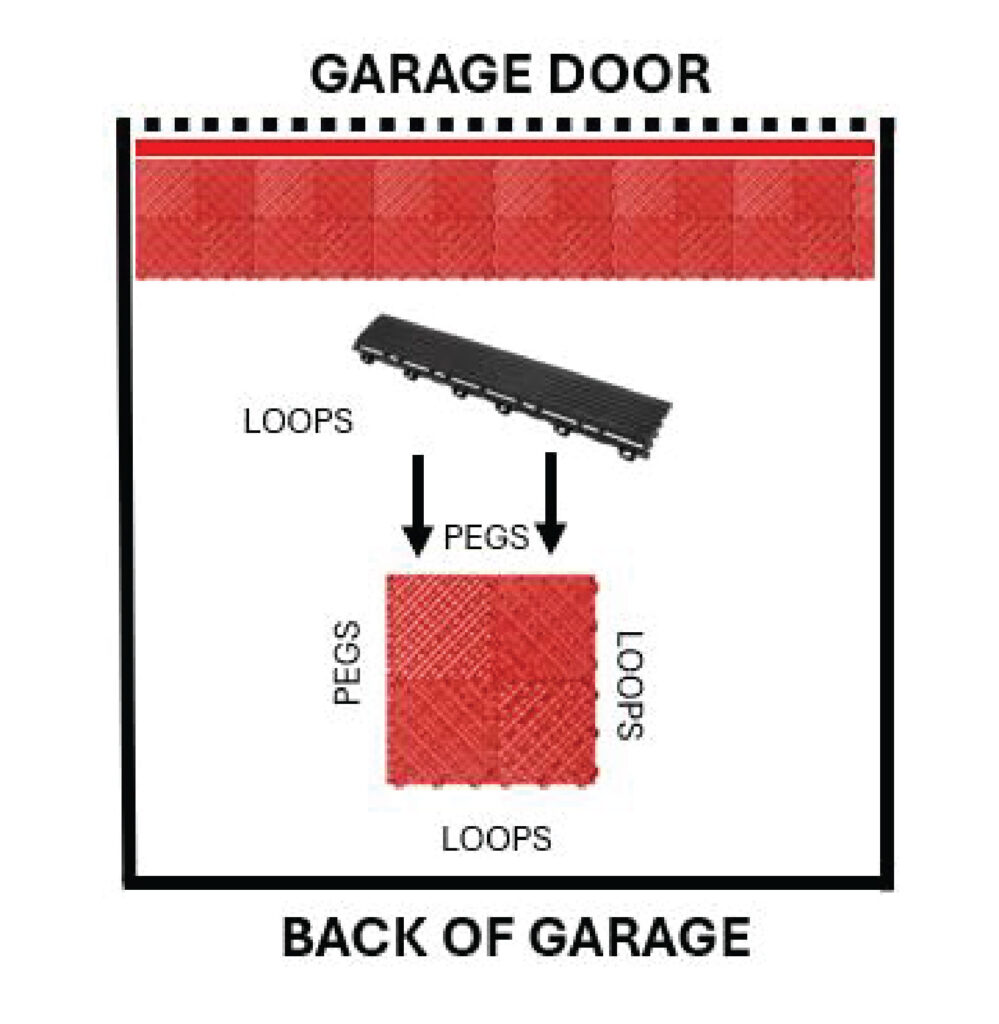
Step 5: Install the First Row of Tiles
Continue installing your FloorEase tiles by aligning the connectors and snapping each tile into place, row by row. Press down firmly or use a rubber mallet if needed to ensure a secure fit. As you go, check the side gaps and adjust the layout so there’s an even space along both garage walls. We recommend leaving a 5–10mm expansion gap on each side to allow for movement.
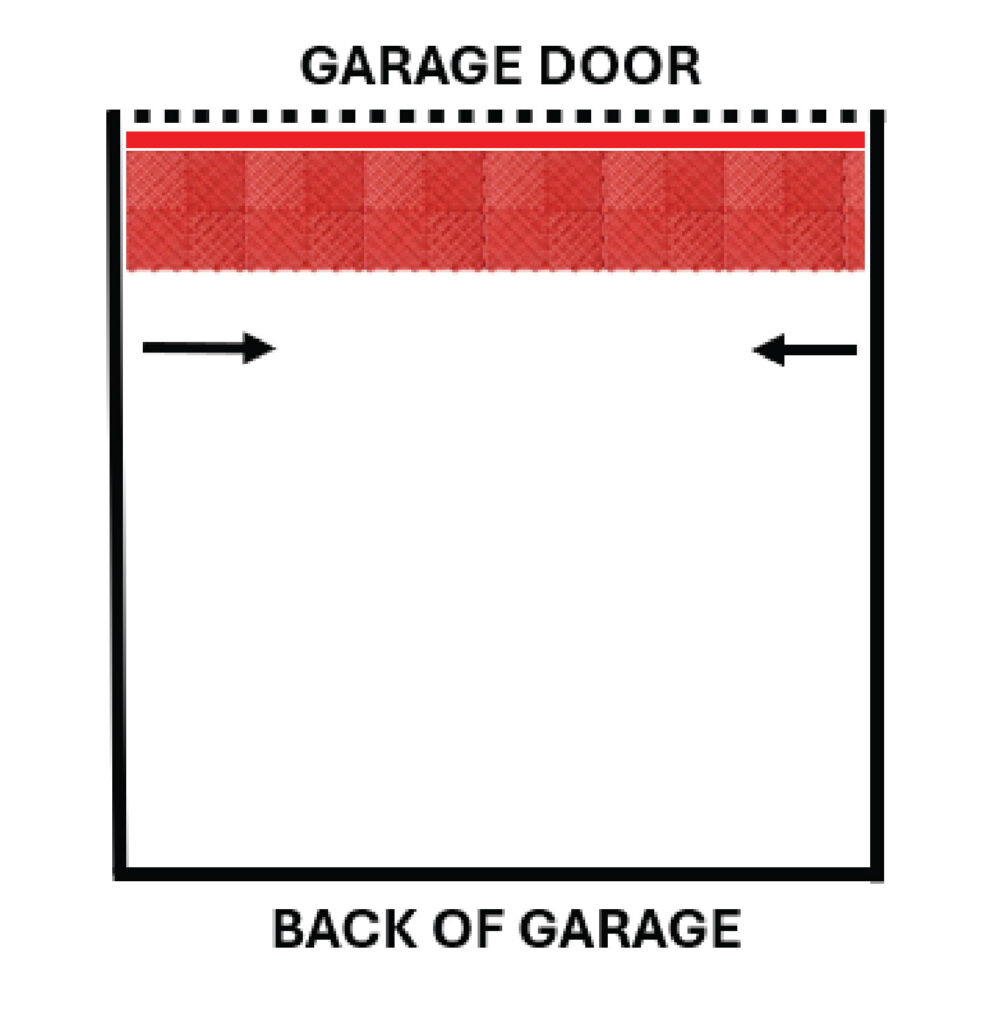
Step 6: Continue Installing Tiles
Install your FloorEase tiles row by row, working your way across the garage floor toward the back wall. Lightly tap the edges with a rubber mallet if needed to ensure each tile locks in securely. When you reach the final row, you may need to cut the tiles for a perfect fit along the back wall.
Step 7: Cut Tiles for Edges (if necessary)
When you reach the edges of the garage, measure the remaining space and mark the tile where it needs to be cut. Be sure to leave a 5–10mm expansion gap along all cuts facing the walls. Use a jigsaw or other suitable tool to cut the tile, ensuring you wear safety gloves and eye protection. Once cut, fit the tile into place along the edge, ensuring it locks securely with the adjacent tiles.
Step 8: Check Alignment and Finish Installation
Once all the tiles are laid, inspect the edges to ensure they’re tightly locked in place. Press down on the tiles to confirm they’re securely connected. If any tiles are loose or misaligned, make the necessary adjustments. Now, step back and enjoy your new floor!